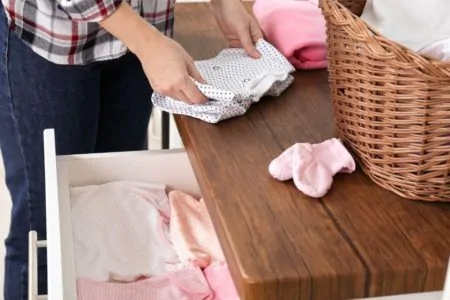
It turns out, folding baby clothes can actually be… therapeutic? If you are drowning in onesies and sleepers, we have the techniques to help you reclaim your sanity and your drawer space.
Key Takeaways
- The KonMari method saves space by “filing” clothes vertically so you can see everything at a glance.
- General rules apply: Use a flat surface, smooth out wrinkles, and ensure the final fold stands on its own.
- Specific techniques exist for onesies, pants, and socks to maximize drawer organization.
- Alternative hacks: Use the roll-up method for travel or over-the-door organizers for accessories.
Folding Techniques: KonMari vs. Traditional
Ask five moms how they fold their baby clothes, and you will probably get five different answers. Some go full “KonMari” with a color-coded nursery, while others rely on the shove-it-in-the-drawer method.
Before we teach you exactly how to fold those tiny garments, let’s look at the two main styles.
1. The KonMari Method
Developed by Marie Kondo, this technique is all about organization that “sparks joy” (1). It is meticulous, but the results are incredibly satisfying.
Here are the six basic rules of the method:
- Commit to tidying up.
- Imagine your ideal lifestyle.
- Discard items before you organize.
- Tidy by category, not location.
- Follow the correct order.
- Ask if the item sparks joy.
For clothing, KonMari uses a “filing” technique. Instead of stacking clothes, you fold them so they stand upright. This lets you see every single item in the drawer at once.
Many parents prefer this because you don’t have to dig to find that one specific shirt. It also prevents the common issue of a baby outgrowing clothes simply because they were buried at the bottom of a stack.
I love folding my kid’s clothes this way, as it makes getting ready in the morning much faster.
Editor's Note:
Jennifer Schlette, MSN, RN2. Traditional Folding
This is the method most of us grew up with. You fold the shirt and stack it on top of another shirt. It is fast, easy, and requires very little brain power.
However, it becomes a hassle when you need the shirt at the bottom of the pile. You pull it out, and suddenly the whole tower topples over.
We generally prefer the KonMari method for drawers because accessibility is key when you are wrangling a wiggly baby. However, if you store clothes on high closet shelves, the traditional stacking method works better since you can’t look “down” into the folds.
How to KonMari Fold According to Garment
Every garment has a specific “sweet spot” for folding. The goal is to create a small, smooth rectangle that stands up on its own.
Keep these general rules in mind before you start:
- Find a clean, flat surface: A bed or changing table works great. You need room to spread out.
- Flatten as you go: Smooth out wrinkles with your hands after every fold. This reduces bulk.
- The “Stand Up” test: The final product should stand upright on a table. If it flops over, it will flop in your drawer too.
- Leave a gap: When folding in half, leave an inch of space at the top to allow for the final fold.
- Use dividers: Marie Kondo suggests using small boxes or dividers for tiny items like socks. This keeps the drawer from becoming a “soup” of fabric.
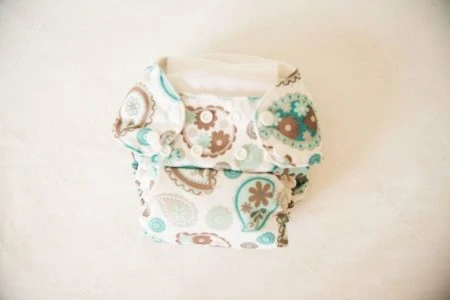
1. Onesies
Onesies are the staple of a baby’s wardrobe, so you will be folding a lot of these.
Start by laying the onesie flat. Fold one side inward lengthwise, then tuck the sleeve back so it lies flat. Repeat on the other side. You should now have a long, skinny rectangle.
Next, fold the bottom up about one-third of the way. Finally, fold it over one more time. The result should be a small, tight square that stands perfectly in your drawer dividers.
2. Shirts
T-shirts are straightforward. Lay the shirt flat and fold one side toward the center. Fold the sleeve back over the body of the shirt. Repeat this on the opposite side.
Smooth it out, then fold the shirt almost in half lengthwise, leaving a small gap at the hem. Fold the bundle into thirds.
For hooded sweatshirts, use the same process. The only difference is that you fold the hood downward into the body before doing the final trifold.
3. Pants
Tiny pants can be surprisingly tricky, but this method keeps them neat. Lay the pants flat and fold one leg entirely over the other.
If there is a sticky-outy part at the crotch, fold that inward to make a straight line. Fold the pants in half, but leave a little gap at the waistband. Finally, fold them upward in thirds. They should look like little fabric burritos standing in a row.
4. Sleepers
Footie pajamas look intimidating because of the feet, but they are actually quite simple.
Lay the sleeper flat with the legs touching. Fold the arms inward across the chest. Grab the feet and fold them upward until the sleeper is folded almost in half. Then, fold the entire bundle in thirds. It creates a compact package that saves massive amounts of drawer space.
5. Socks
Stop rolling your socks into balls! It stretches out the elastic ankle bands and ruins the fit.
Instead, lay one sock flat and place the matching sock directly on top of it. Simply fold them in half (or thirds for longer socks). Place them upright in a small box or drawer organizer.
6. Underwear
If you are potty training, you know how quickly toddlers go through underwear.
Lay the underwear flat. Fold the crotch up to the waistband to make a compact rectangle. Then, fold the sides in (or fold in half depending on the size). It creates a tiny square that slots perfectly into a designated bin.
Other Hacks for Folding Baby Clothes
KonMari is great, but sometimes life gets messy, or you have awkward items that just won’t fold into a rectangle.
Here are a few alternative tricks to keep things tidy:
- The Ranger Roll: This is perfect for travel. Fold the sleeves in, then roll the shirt or onesie tightly from the top down into a cylinder. It saves space and prevents creases.
- Pants roll-up: Similar to the shirt roll, fold pants in half lengthwise and roll from the waist down.
- Bib storage: Baby bibs are awkward. Instead of stacking them, fold the neck strap down and roll them up. Store them vertically in a small bin.
- Vacuum seal bulky items: For thick winter coats and snowsuits, use hanging vacuum bags. This compresses the air and saves precious closet rod space.
- Vertical door storage: Use an over-the-door organizer for small, easy-to-lose items. It is perfect for mittens, hats, and hair bows.
- Closet dividers: If you hang clothes, hanger dividers are a lifesaver. Organize by age (0-3M, 3-6M) so you don’t accidentally skip a size before your baby wears it.
FAQs

How Do You Store Baby Clothes With Minimal Space?
To store baby clothes with minimal space, use drawer dividers, closet organizers, and vacuum bags. Fold clothes efficiently using the KonMari method and utilize vertical space with hanging shelves or over-the-door pockets.

Should I Roll or Fold Baby Clothes?
Rolling baby clothes saves space and helps reduce wrinkles, making it great for packing or deep storage. However, folding is often better for daily use in drawers because it is easier to maintain the organization.

Should You Organize Baby Clothes By Size or Type?
Organizing by size is priority number one; this ensures you know what fits the baby right now. Within each size category, organize by type (e.g., all 3-6M onesies together, all 3-6M sleepers together) for the easiest access.

How Do You Fold and Store Swaddles?
Fold swaddles into a square and then roll them into a tight cylinder. Store them upright in a basket or drawer divider so you can grab one quickly during a middle-of-the-night diaper change.
How Do I Keep Folded Baby Clothes From Falling Over?
The key to keeping KonMari-folded clothes upright is packing the drawer correctly. Do not overstuff it, but ensure there is enough tension between items so they support each other; using spring-loaded drawer dividers helps keep rows tight and upright.