Between navigating TSA regulations, keeping your liquid gold cold, and remembering every little pump part, the anxiety can spike before you even pack your suitcase.
Don’t panic. We’ve done the heavy lifting to create this comprehensive guide on pumping while traveling. Whether you are flying across the country or taking a road trip, we have the tips you need to transport your milk safely so it arrives fresh and ready for your little one.
Key Takeaways
- Know the rules: TSA allows breast milk, toddler drinks, and baby food in quantities greater than 3.4 ounces in carry-on bags.
- Cooling strategy: Frozen milk and solid ice packs are easier to get through security than slushy or liquid ones.
- Hotel hacks: Always call ahead to ensure your room has a working refrigerator or request one for medical necessity.
- Backup plans: If you cannot transport the milk home yourself, services like Milk Stork can ship refrigerated or frozen milk for you.
What Should I Pack?
Regardless of which pump you use, your breast pump bag needs to be stocked with essentials to handle any hiccup on the road. Here is a checklist to ensure you are prepared for anything:
- The pump: Your primary electric pump and a manual backup just in case.
- Accessories: Extra flanges, valves, membranes, tubing, and your power cord.
- Power options: A car adapter, battery pack, and an international converter if going abroad.
- Storage: Milk collection bottles and plenty of storage bags.
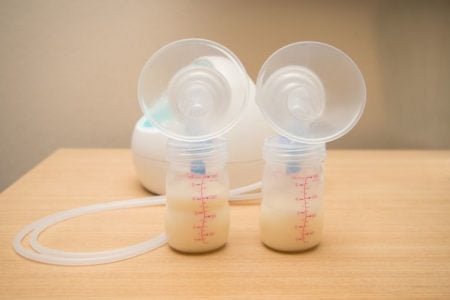
- Cooling: A high-quality breast milk cooler and extra freezer packs.
- Cleaning: Breast pump sanitizing wipes, a travel drying rack, and travel-size dish soap.
- Privacy: A nursing cover if you prefer coverage while pumping in public.
- Comfort: A hands-free pumping bra is a game-changer for travel.
- Labeling: A permanent marker to date and time every bag.
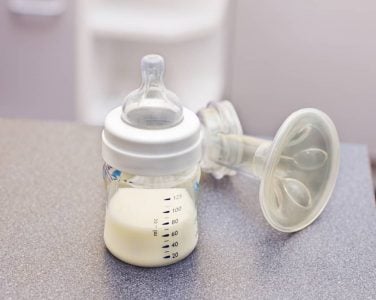
How To Keep Milk Fresh
Once you have pumped the milk, the clock starts ticking. Breast milk’s shelf life is precious, and maintaining the right temperature is non-negotiable. Here are the best methods for keeping your stash safe while on the move:
- Cooler with freezer packs: This is the standard for air travel. Freshly expressed milk can stay safe in an insulated cooler with frozen ice packs for up to 24 hours (1). Keep the cooler closed as much as possible to retain the chill.
- Electric car cooler: If you are road-tripping, plug-in coolers are fantastic. They maintain a steady temperature without the mess of melting ice.
- Ship it home: For long trips or massive supplies, you might want to skip the carry-on hassle entirely. Services like Milk Stork specialize in shipping breast milk, or you can pack a cooler with dry ice and ship it overnight via major couriers.
How To Transport Milk
Moving milk from point A to point B requires a bit of strategy. Keep these guidelines in mind:
- To freeze or not to freeze: If you can keep the milk frozen solid until you get home, freezing is a great option because solid liquids fly through TSA easier. However, if it partially thaws (has ice crystals), it can be refrozen. If it thaws completely, it must be used within 24 hours (2).
- Hotel refrigeration: Call your hotel in advance. If the room lacks a fridge, request one. Many hotels have a limited supply of “medical refrigerators” available for guests with medication or breast milk.
- Dry ice rules: If shipping or flying with dry ice, check regulations first. It is considered a hazardous material. Most airlines limit you to 5.5 pounds of dry ice in carry-on or checked luggage, and the package must be vented to allow carbon dioxide gas to escape (3).
- Protect the bags: Dry ice burns freezer bags (and skin). Always wrap your milk bags in newspaper or a towel before packing them near dry ice to prevent the plastic from becoming brittle and cracking.
What About Air Travel Regulations?
Flying causes the most stress for pumping moms, mostly due to confusing liquid rules. The good news is that the law is on your side.
Expressed Milk And Air Travel
Per the Transportation Security Administration (TSA), breast milk is considered a medically necessary liquid. It is allowed in carry-on bags in quantities exceeding 3.4 ounces, and you do not need to have your baby with you to bring it through (4).
Notify The TSA
While x-ray machines are considered safe for food and milk, you have the right to refuse x-ray screening for your breast milk. If you choose this, inform the agent immediately. They will perform additional screening steps, which may include a pat-down of you and your luggage.
TSA agents may ask to test the milk for explosives. Usually, this involves a vapor test over the bottle. They should never insert a test strip directly into your milk.
Take Note
Milk Storage And Air Travel
Here is a pro tip for flying: freeze your liquids. Solid frozen items (milk and ice packs) are not subject to the same testing as liquids.
If your ice packs are slushy or partially melted, the TSA must screen them as liquids. If they are frozen solid, they usually pass right through the x-ray without a second glance.
Life Saver
Breast Pumps And Air Travel
Your breast pump is generally considered a personal item, but policies vary by airline regarding carry-on limits.
However, the FDA considers breast pumps medical devices. Many airlines will allow you to bring your pump bag in addition to your standard carry-on and personal item. We highly recommend checking your specific airline’s policy page and printing it out to show gate agents if necessary.
If you are traveling internationally, your destination airport may have different rules. As airport rules tend to change frequently, be sure to investigate these before traveling so you know what to expect.
Editor's Note:
Michelle Roth, BA, IBCLCPumping Travel Checklist
Follow this step-by-step workflow to breeze through the airport:
- Check airline policies: Verify if your airline counts the pump bag as a medical device (exempt from baggage limits) or as a standard carry-on.
- Freeze everything: Ensure your ice packs are frozen solid before you leave for the airport to minimize screening hassles.
- Separate at security: Do not bury your milk cooler in your suitcase. Pull it out and place it in its own bin.
- Communicate clearly: Tell the TSA agent, “This is breast milk and cooling accessories.” If you do not want it x-rayed, state that now.
- Monitor the screening: Watch the agents. If they need to open a bottle for a vapor test, ensure they use fresh gloves. If they try to dip a strip in the milk, politely demand a supervisor.
- Allow extra time: If you opt for manual screening (no x-ray), it will take longer. Arrive at the airport 30 minutes earlier than usual.
Pumping While Traveling (Step-by-Step)
1. Choose the Right Pump
Match your pump to your trip. If you are going on a wilderness retreat with no electricity, a manual pump is essential. For a business trip with long conference hours, bring a robust electric pump with a battery pack.
2. Pick Your Milk Storage Method
Assess the spoilage risks. If you are facing a six-hour drive in July, a standard lunchbox won’t cut it, get a high-performance cooler or a plug-in car fridge.
For flights, a compact cooler that fits inside your carry-on is best. Avoid dry ice for flights unless you are shipping the milk as cargo, as the regulations can be a headache for carry-on luggage.
3. Do Your Research
A little recon goes a long way. Before you leave, find the answers to these questions:
- Does the hotel room have a fridge, or do I need to reserve one?
- Is there a “Mamava” pod or mother’s room at the airport terminals I’m using?
- Does my office destination have a lactation room?
- Where is the nearest store to buy backup batteries or storage bags?
4. Make a Pumping Plan
Travel disrupts routines, and missed sessions can lead to clogged ducts or a supply drop. Set alarms on your phone to mimic your baby’s feeding schedule. If you are crossing time zones, try to stick to your home intervals (e.g., every 3 hours) rather than specific clock times until you adjust.
5. Get Creative with Locations
You might not always find a pristine lactation suite. You may have to pump in public. Here are some strategies:
- The car: Pumping while driving (with a hands-free bra) or in a parked car is very common. Use a nursing cover or sunshades for privacy.
- Airports: Download apps like “Moms Pump Here” or check the airport website for nursing pods.
- In flight: You are allowed to pump in your seat. A window seat offers more privacy; just use a cover and the noise of the engine will likely drown out the pump sound.
6. Clean on the Go
Hygiene is tricky when you don’t have a kitchen sink. If you cannot wash parts with hot soapy water immediately, use breast pump wipes to remove residue. Once you reach your hotel, do a thorough wash and sterilization.
7. Store Immediately
Get that milk cold fast. If you are using a cooler bag, keep it out of direct sunlight. If you are in a hotel, transfer milk from the cooler to the mini-fridge immediately. Use the back of the fridge where it is coldest, not the door.
8. Pack for the Return
When flying home, pack the milk tightly. Fill any empty space in your cooler with newspaper or extra ice packs to prevent bottles from shifting. If you have frozen milk, keep it frozen. If it’s liquid, keep it cold. Leak-proof everything by placing bottles inside Ziploc bags.
Which Breast Pump Is Best For Traveling?
Choosing the right gear is half the battle. The best travel pump depends on your trip length, luggage capacity, and milk supply needs. Here is how the different types stack up.
Hospital-Grade Pump
These are the heavy-duty, multi-user pumps often rented from hospitals. They have powerful motors and are ideal for maintaining supply, but they are beasts to carry.
Best For:
- Moms exclusively pumping or struggling with low milk supply.
- Trips where you stay in one place (like a relative’s house) rather than moving hotels daily.
Pros
- Superior suction and efficiency.
- Durable and reliable.
- rental options available at destination cities to save packing space.
Cons
- Heavy and bulky; difficult to fly with.
- Usually requires a wall outlet (no battery option).
- Expensive to rent or replace if lost.
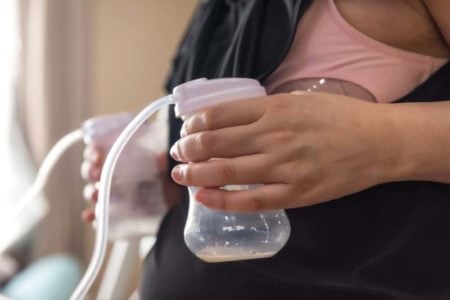
Portable Electric Pump
These are the most popular choice for modern moms. They are small, lightweight, and often strong enough for daily use. Many “wearable” pumps (that fit entirely inside your bra) fall into this category.
Best For:
- Air travel and road trips.
- Working moms who need discretion.
- Pumping in tight spaces like airplane seats or cars.
Pros
- Battery-operated options offer freedom from outlets.
- Compact and fits easily in carry-ons.
- Good balance of suction and portability.
Cons
- batteries can die mid-trip (bring a backup!).
- Suction may be slightly less than hospital-grade units.
- Wearable models can be prone to leaking if you move too much.
Manual Breast Pump
Powered by your hand, these simple pumps are the ultimate backup. They are tiny, silent, and unbreakable. Even if you bring an electric pump, packing a manual one is smart insurance.
Best For:
- Emergency backup.
- Short trips (1-2 days).
- Relieving pressure on a flight without setting up a full electric rig.
Pros
- Ultra-lightweight and fits in a purse.
- Silent operation (great for plane seats).
- Zero dependence on electricity or batteries.
Cons
- Hand fatigue is real.
- Slower than electric pumps.
- Harder to trigger a let-down for some moms.
FAQs
Does Breast Milk Count As A Carry-on?
No. Breast milk and breast pumps are considered medical necessities. The milk does not count toward your carry-on allowance, and on most airlines, the breast pump bag is also exempt from the carry-on limit (though you should verify this with your specific airline).
Can I Pump In My Seat On An Airplane?
Yes, you are allowed to pump in your seat. It is recommended to choose a window seat for privacy and use a nursing cover. Since airplane bathrooms are generally unsanitary and cramped, pumping in your seat is often the cleaner and more comfortable option.
Do I Need A Doctor’s Note To Fly With Breast Milk?
No, TSA regulations do not require a doctor’s note to travel with breast milk, cooler packs, or breast pumps. However, carrying a printed copy of the TSA regulations regarding breast milk can be helpful if you encounter an agent unfamiliar with the rules.
Safe Travels, Mama
Traveling with a pump takes a little extra brainpower, but it is absolutely doable. With the right gear, a clear plan for security, and a reliable cooler, you can keep your supply up and your milk safe no matter where your journey takes you.
Take a deep breath, trust your preparation, and remember: you are doing an amazing job providing for your baby, even from miles away.