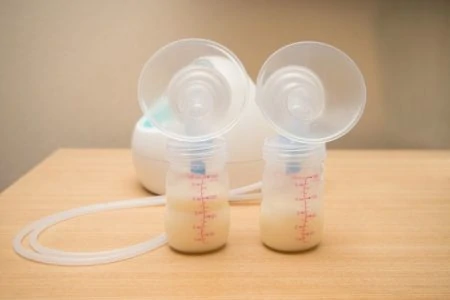
Let’s face it, pumping breast milk is a labor of love, but the cleanup isn’t nearly as rewarding. You want to ensure your baby gets liquid gold without any harmful bacteria, but staring at a pile of flanges and valves at 2 a.m. is exhausting.
Cleaning breast pump parts can feel tedious, yet it is the single most important step to protect your little one’s health. Old milk residue can quickly become a breeding ground for germs and mold if not handled correctly.
We have pumped for years, tested dozens of brands, and studied CDC guidelines to streamline this process for you. We know how to make it fast, effective, and safe.
In this guide, we will break down exactly how to clean, sterilize, and store your pump parts so you can spend less time at the sink and more time with your baby.
Key Takeaways
- Use a dedicated basin: Never wash pump parts directly in the kitchen sink; use a separate wash basin and brush specifically for baby items to avoid cross-contamination.
- Air dry completely: Moisture is the enemy; always let parts air-dry on a clean paper towel before storing them to prevent mold growth.
- Know when to sterilize: Daily sterilization is crucial for babies under 3 months or those who are immunocompromised, while older, healthy babies may only need daily washing.
- Inspect parts often: Check valves and tubing regularly for wear, tears, or mold, and replace them immediately to maintain suction and hygiene.
The Golden Rules of Pump Hygiene
Before we dive into the scrubbing instructions, there are a few non-negotiables you need to know to keep your milk safe (1).
- Wash your hands first: It sounds simple, but it is the first line of defense. Scrub up with soap and water for 20 seconds before touching your pump kit or your breasts.
- Watch out for mold: Mold loves moisture. While milk shouldn’t get into your tubing, condensation can. If you see black specs in your tubing, toss it. It is impossible to clean effectively.
- Separate your supplies: Your kitchen sink drain is a bacterial playground. To prevent germs from transferring to your baby’s food, use a dedicated wash basin that is only for pump parts and bottles.
- Store it right: Don’t throw clean parts into a Ziploc bag while they are still damp. This traps moisture and invites bacteria. Only store parts once they are bone dry.
Why Mold and Residue Are Dangerous
You might wonder if skipping a wash here and there matters. Unfortunately, it does. Residual milk fat can spoil, and moisture can lead to mold growth.
If inhaled or ingested, mold can trigger allergic reactions, respiratory issues like asthma, and other illnesses (2). Because a baby’s immune system is still developing, they are much more susceptible to these germs than adults are.
Choosing the Right Soap
You do not need medical-grade detergent to clean your supplies. The FDA recommends using standard liquid dishwashing soap and warm water (3).
However, many moms prefer fragrance-free options to avoid leaving strong scents on the silicone parts. Brands like Medela offer a specialized breast milk removal soap designed to break down breast milk fat, which can be stubborn. If you are using a standard Medela pump or similar, this can be helpful, but your regular Dawn or Palmolive works just fine too.
Step-by-Step Cleaning Guide
According to the CDC, proper cleaning involves more than a quick rinse. Here is the safest routine to follow (4):
Before You Pump
- Inspect your gear: Assemble your breast pump and look for debris or mold.
- Check the tubing: If the tubing looks cloudy or moldy, discard it immediately.
- Clean your station: Wipe down the dials and power button with a disinfectant wipe.
Immediately After Pumping
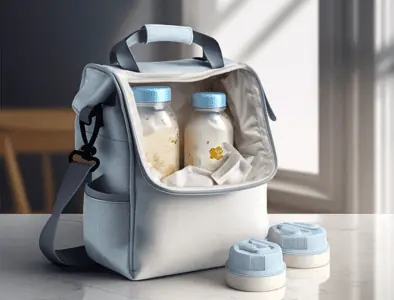
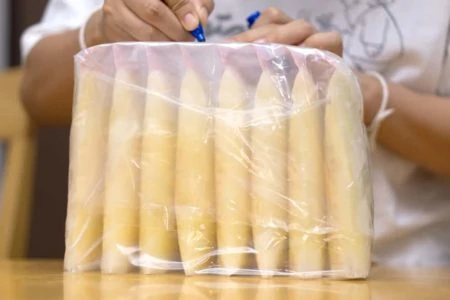
- Secure the milk: Pour your pumped milk into a storage bottle or bag. Label it with the date and time, then get it into the fridge or freezer immediately (see storage guidelines).
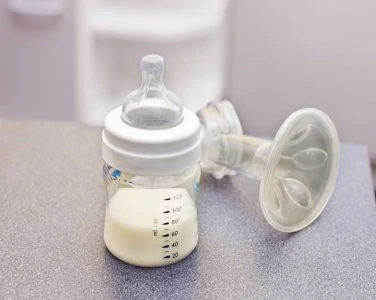
- Disassemble everything: Take apart every piece that can be separated. Remove valves from flanges and membranes from valves. This prevents milk from hiding in crevices.
- Rinse immediately: Hold the parts that touched milk (flanges, valves, bottles) under cool running water to rinse off the remaining milk proteins.
Method 1: Hand Washing (The Gold Standard)
This is the most thorough method and is recommended for most pump parts.
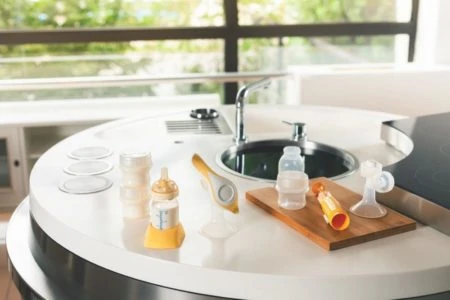
1. Prepare the basin
Place all disassembled parts into your dedicated wash basin. Do not place them directly in the sink bowl.
2. Scrub with hot water
Fill the basin with hot water and dish soap. Use a dedicated bottle brush (one that does not clean spaghetti sauce off your dinner plates) to scrub every surface. Pay close attention to the tiny flaps on duckbill valves.
3. Rinse thoroughly
Hold the items under fresh running water to remove all soap suds and residue.
4. Air dry
Place the parts on a clean, unused paper towel or a clean drying rack. Do not use a cloth dish towel to dry them, as cloth towels can carry germs. Allow them to air-dry completely.
Method 2: Using the Dishwasher
Many modern pump parts are dishwasher safe, but you must check your manual first. Silicone parts can sometimes warp in high heat.
1. Secure small parts
Place valves, membranes, and small caps into a mesh laundry bag or a closed-top dishwasher basket. If you don’t, they will fly around and likely end up melted on the heating element.
2. Load properly
Place larger items like flanges and bottles on the top rack.
3. Use high heat
Run the machine on a hot water setting with a heated drying cycle (or sanitizing cycle) to kill bacteria.
4. Remove carefully
Wash your hands before unloading the clean parts. If they are not 100% dry, place them on a paper towel to finish air-drying.
Sanitizing vs. Cleaning: What is the Difference?
Cleaning removes visible milk and dirt; sanitizing (or sterilizing) kills the germs that remain (5). You don’t necessarily need to sterilize after every single use, but you should do it once a day if your baby falls into these categories:
- Premature infants: Babies born early have fragile immune systems.
- Newborns: Infants under 3 months old are more susceptible to infection.
- Compromised immunity: Babies undergoing medical treatment or dealing with illness.
For older, healthy babies, thorough daily washing is usually sufficient. However, sanitizing once a day or weekly is still a good practice for peace of mind.
Dishwasher Note
How to Sanitize
Steam:
Use a microwave steam bag (like those from Medela) or an electric bottle sterilizer. These are fast and effective. Follow the manufacturer’s guidelines for water levels and timing.
Boil:
Place safe parts in a pot of water, bring it to a boil, and let them boil for 5 minutes. Remove with clean tongs. *Caution: Some soft silicone parts may warp if they touch the bottom of the hot metal pot, so keep an eye on them.*
Storing Your Clean Kit
The biggest mistake moms make is storing parts while they are slightly damp. Moisture in a closed container creates a greenhouse for bacteria.
Once your parts, brushes, and wash basin are completely dry, reassemble the pump kit with clean hands. Store the kit in a clean, sealable food storage bag or a dedicated Tupperware container to keep dust and pet hair away.
Pumping and Cleaning at Work
Returning to the office adds a layer of complexity. If your workplace has a dedicated mother’s room with a sink, great. If not, you need a plan (guide to pumping at work).
Here is how to handle the hygiene hurdles:
- Use wipes in a pinch: If you don’t have water, use baby-safe breast pump disinfectant wipes to clean the flanges and bottles after use. This is a temporary fix until you can wash them at home.
- Microwave steam bags: These are a lifesaver at the office. If you have access to a microwave, you can rinse and steam your parts in minutes (check out these bags).
- The “backup” strategy: Instead of cleaning at work, buy extra sets of flanges and parts. Put the used ones in a “dirty bag” to wash at home, and use a fresh set for your next session.
FAQs
What Is the “Fridge Hack” and Is It Safe?
The “Fridge Hack” involves putting used pump parts in a sealed bag in the refrigerator between sessions to avoid washing them every time. While popular, the CDC does not recommend this method because bacteria can still grow at fridge temperatures. It is safer to wash parts after every use.

What Happens If You Don’t Sterilize Breast Pump Parts?
Skipping sterilization allows bacteria and mold to develop in milk residue, which can lead to infections like thrush or gastrointestinal illness in your baby. While healthy older babies may tolerate standard washing, skipping sterilization for newborns is risky.

Can I Wash Tubing in the Dishwasher?
Generally, no. Most manufacturers advise against washing tubing unless breast milk has accidentally entered it. Tubing takes a long time to dry, and moisture inside promotes mold growth. Wipe the outside, but keep the inside dry.

Can You Clean a Breast Pump With Baby Wipes?
You can use dedicated breast pump wipes for temporary cleaning (like at work or on a plane), but they do not replace soap and warm water. You should thoroughly wash the parts as soon as you have access to a sink.

How Often Should I Replace Pump Parts?
Silicone parts like duckbill valves and membranes stretch out over time, which reduces suction. Replace valves every 4 to 8 weeks if you pump exclusively. Replace backflow protectors every 3 to 6 months, or sooner if they show signs of wear.

Do Pump Parts Have to Be Dry Before Pumping?
Yes, mostly. While a few drops of water on the flange won’t hurt, moisture in the tubing or backflow protector can damage the pump motor and encourage mold. It is best to let everything dry completely to ensure proper suction and hygiene.

How Long Does a Pump Stay Sterile?
Pump parts remain sterile only as long as they are kept in a sterile environment. Once you touch them or place them on a drying rack, they are “clean” but no longer technically “sterile.” Use them within 24 hours of sanitizing.