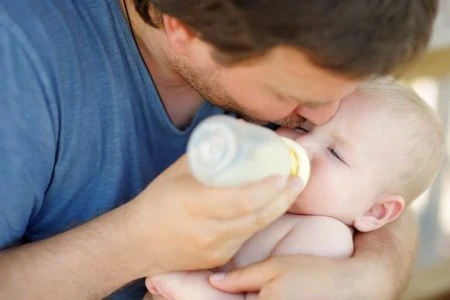
Let’s be honest: keeping a tiny human alive is stressful enough without worrying about invisible germs lurking in their lunch.
Because babies have immature digestive tracts and developing immune systems, they are much more susceptible to infection than adults. Unfortunately, a simple rinse in the sink isn’t always enough to kick harmful bacteria to the curb.
Sterilizing your baby’s bottles is the best way to ensure every sip is safe. While the process might sound like a science experiment, it is actually quite simple once you know the basics.
We’ve broken down the most effective sterilization methods, safety tips, and expert guidelines to help you keep your feeding gear squeaky clean.
Key Takeaways
- Safety first: Sterilizing eliminates harmful bacteria that standard washing might miss, which is crucial for newborns and preemies.
- Multiple methods: You can use boiling water, the microwave, electric steam machines, UV light, or even the dishwasher.
- Prep is essential: Always wash bottles with hot, soapy water to remove milk residue before you start the sterilization process.
- Know the timeline: Most pediatricians recommend sterilizing bottles until your baby is at least one year old.
Why Should I Sterilize Baby Bottles?
When babies enter the world, their immune systems are a blank slate. They haven’t built up the defenses necessary to fight off the millions of bacteria we encounter daily. While some immunity passes from parent to child during pregnancy and breastfeeding, it isn’t a complete shield (1).
Experts recommend sterilizing bottles for the first few months of life to bridge this gap. This process kills viruses, bacteria, and parasites hiding in the threads of a bottle ring or the tip of a nipple.
You should be extra diligent about sterilizing if:
- You are using secondhand, borrowed, or hand-me-down bottles.
- Your baby was born prematurely or has a compromised immune system.
- Your baby has recently been sick.
- You do not have access to treated, safe municipal tap water.
What Can Happen if I Don’t Sterilize?
Skipping sterilization doesn’t guarantee your baby will get sick, but it does increase the risk significantly. If bacteria grows in leftover milk residue, your baby could be exposed to illnesses such as:
- Gastroenteritis (stomach flu).
- Food poisoning.
- Diarrhea.
- Vomiting.
- Hepatitis A.
- Rotavirus.
These illnesses are tough on anyone, but for a newborn, the resulting dehydration can be dangerous and escalate quickly (2).
What Are the Different Sterilization Methods?
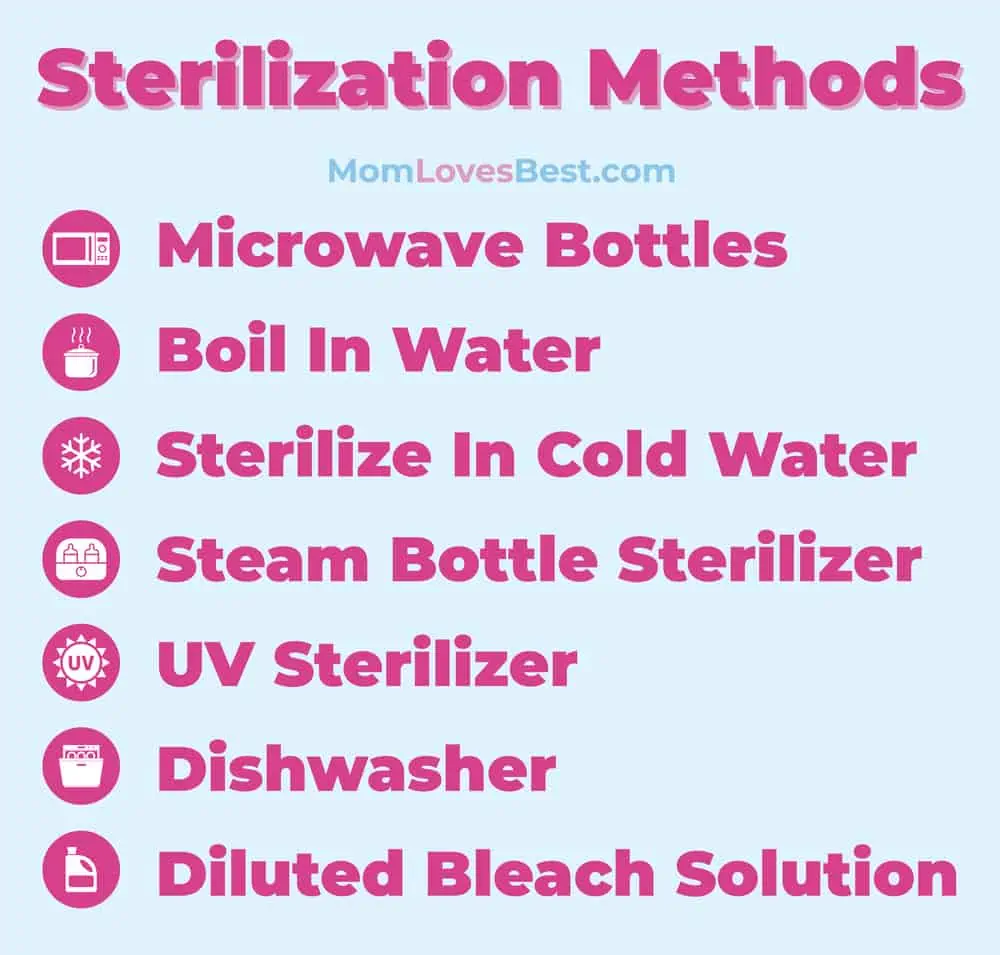
Parents today have more options than ever before. Common methods include:
- Microwaving (steam).
- Boiling in water.
- Cold water sterilization (tablets/solution).
- Electric steam baby bottle sterilizers.
- UV light sterilizers.
- Dishwasher sanitation cycles.
- Diluted bleach solution (the “last resort” method).
Remember: Sterilization is step two. Step one is always washing the bottles to remove visible food particles.
Which Sterilization Method Is Best?
The “best” method is the one that fits your budget, counter space, and patience level. Here is a quick breakdown to help you decide.

If you want the cheapest option
You can use items you likely already have:
- The boiling water method (requires a large pot).
- The dishwasher method (if your machine has a sanitize cycle).
- The microwave method (requires a microwave-safe bowl).
- A diluted bleach soak.
If you want to avoid chemicals
Stick to heat-based methods and skip these:
- Diluted bleach soaks.
- Cold water sterilization tablets or solutions.

If you want speed and convenience
Investing in gear can save you time:
- Electric steam sterilizers (set it and forget it).
- Microwave steam bags or containers.
- UV sterilizers (no water required).

If you have a small kitchen
Avoid bulky appliances that hug the countertop:
- Large electric steam sterilizers.
- Cabinet-style UV sterilizers.

If you are traveling
Look for portability:
- Microwave steam bags.
- Cold water sterilization tablets.
- Portable/mini UV sanitizers.
How Often Should I Sterilize Baby Bottles?
You generally do not need to sterilize baby bottles after every single feed. A thorough wash with hot, soapy water is usually sufficient for daily cleaning.
However, you should definitely sterilize in these specific scenarios:
- Before the very first use of brand-new bottles.
- If your baby has been sick, especially with oral thrush or a stomach bug.
- If you notice white build-up or milk residue inside the nipples.
- If you are traveling to an area with questionable water quality.
- If you use well water, consider sterilizing more frequently (3).
Are Bottles the Only Thing That Needs Sterilizing?
If it goes in your baby’s mouth, it should probably be sterilized. Don’t forget to include:
- Bottle bodies.
- Silicone nipples.
- Screw rings and caps.
- Pacifiers.
- Breast pump flanges and valves (check your manual first).
Safety Tips and Things to Avoid
While sterilizing is generally safe, it involves heat and chemicals. Keep these precautions in mind to protect yourself and your little one.
- Watch out for steam: Steam is hotter than boiling water. When opening a microwave bag or electric sterilizer, keep your face and hands back to avoid serious burns.
- Handle bleach with care: Never use undiluted bleach. It is a powerful chemical that can be fatal if ingested in high concentrations. Always follow dilution ratios exactly.
- Check your plastics: Heat degrades plastic over time. If your bottles contain BPA (common in older bottles), switch to a no-heat method or, better yet, replace them with BPA-free options. Heat causes BPA to leach into milk (4).
How Do I Sterilize Baby Bottles?
Regardless of the method, Step 1 is always cleaning. Wash all parts in hot, soapy water and rinse them well. You cannot sterilize a dirty bottle; the food residue creates a shield for bacteria.
Once clean, choose your method below.
1. The Microwave Method
This is fast and effective, but you need to be careful of hot spots.
- Start with a clean microwave.
- Fill the bottles about halfway with water.
- Place nipples, rings, and caps in a microwave-safe bowl filled with enough water to cover them.
- Microwave on high for 90 seconds.
- Wait for the bottles to cool before grabbing them.
For an easier experience, you can buy microwave steam sterilizers (like this one) or reusable steam bags.
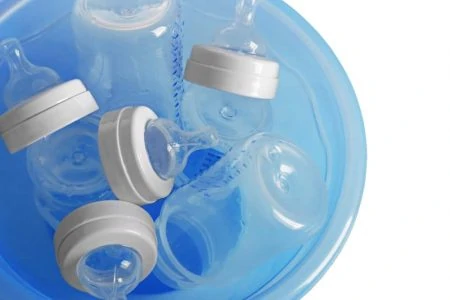
2. The Boiling Water Method
This is the “old school” method that costs nothing but requires vigilance.
- Fill a large pot with water and submerge all bottle parts.
- Ensure no air bubbles are trapped inside the bottles.
- Bring the water to a rolling boil.
- Boil for 5 to 10 minutes (check your manufacturer’s recommendation).
- Turn off the heat and remove items with clean tongs.
- Place items on a clean drying rack.
Note: Monitor the pot closely. If the water evaporates, plastic bottles can melt against the hot metal pot, ruining your gear.
3. The Cold Water Method
Perfect for camping or traveling, this method uses sterilization tablets (like Milton) or liquid concentrate.
- Fill a container with cold tap water.
- Add the tablet or solution per the package instructions.
- Submerge all items, ensuring no air bubbles remain inside.
- Leave them to soak for the required time (usually 15 to 30 minutes).
- Remove and shake off excess water. Do not rinse them with tap water, or you will undo the sterilization.
4. The Electric Steam Sterilizer
These countertop devices are popular because they are spacious and automated.
- Place clean bottles upside down in the unit.
- Add the specific amount of water required by your model.
- Press the start button and walk away.
- Wait for the cycle to finish and cool down before opening.
5. The UV Sterilizer
UV sterilizers look like mini fridges or toaster ovens and use ultraviolet light to kill germs without heat or water.
- Shake excess water off your washed bottles.
- Place them inside the unit.
- Select the “Sterilize” or “Auto” (Dry + Sterilize) mode.
- Once the light goes off, your bottles are ready to use.
6. The Dishwasher Method
Not all dishwashers get hot enough to sterilize, so check your manual for a “Sanitize” cycle or NSF/ANSI Standard 184 Certification (5).
- Place bottles upside down on the top rack.
- Put nipples, rings, and small parts in a dishwasher basket to prevent them from falling onto the heating element.
- Select the “Sanitize” cycle with a heated dry setting.
- Remove items only after the drying cycle is complete.
7. The Bleach Solution Method
This is often used in childcare settings or emergencies.
- Wash and rinse the bottles first.
- Mix 2 teaspoons of unscented bleach into 1 gallon of water.
- Submerge items completely, squeezing solution through the nipple holes.
- Soak for at least 2 minutes.
- Remove with clean hands or tongs.
- Do not rinse. Place on a clean rack to air dry completely. Any trace bleach breaks down quickly as it dries.
FAQs

What is the Safest Way to Sterilize Baby Bottles?
The safest methods are electric steam sterilizers or boiling water. Steam machines are generally preferred because they eliminate human error and temperature inconsistencies. Boiling is effective, but you must ensure the bottles stay submerged and don’t melt on the bottom of the pot.
Do You Have to Sterilize Baby Bottles After Every Feed?
No, you do not need to sterilize after every single feed. However, you should sterilize at least once a day if your baby is under three months old, was born prematurely, or has a compromised immune system. For older, healthy babies, daily sterilization isn’t usually necessary as long as you wash bottles thoroughly.
At What Age Do You Quit Sterilizing Baby Bottles?
Most pediatricians agree that you can stop sterilizing bottles when your baby is one year old. By this age, their immune system is stronger, and they are likely putting non-sterile toys and fingers in their mouths anyway. If your child has health issues, consult your doctor before stopping.

Where Do You Store Baby Bottles After Sterilizing?
Once sterilized and fully dried, assemble the bottles (put the nipples and caps on) to keep the inside sterile. Store them in a clean, enclosed kitchen cabinet or a dedicated plastic bin. Avoid leaving them out on open countertops where dust or pet dander can settle on them.

Do Sterilized Bottles Need to Be Kept in the Fridge?
No, empty sterilized bottles do not need to be refrigerated. They can be stored at room temperature in a clean cupboard. However, if you have pre-mixed formula or pumped breast milk in the bottles, those absolutely must go in the fridge immediately.

How Long Do Bottles Stay Sterile at Room Temperature?
If you assemble the bottle (put the nipple, ring, and cap on) immediately after sterilizing, it remains sterile for 24 hours. If you leave the bottle open or disassembled, it is no longer sterile once it touches the air, though it is still clean enough for immediate use.
How Should I Dry Sterilized Bottles?
Air drying is the best method. Place the items on a clean drying rack in a dust-free area. Do not use a dish towel to dry the inside of the bottles or nipples, as towels can transfer bacteria back onto your clean gear.