Sippy cups are lifesavers for preventing spills, but all those clever leak-proof seals make them notoriously difficult to clean. If you don’t scrub the right spots, moisture gets trapped, and mold starts to grow before you even notice it.
We have years of combined experience scrubbing stubborn milk residue out of valves and straws. We updated this guide with the best cleaning techniques to help you keep those cups fresh, sanitary, and safe for your kids.
Key Takeaways
- Check the hidden spots: Mold loves to hide in spouts, anti-leak valves, and weighted straws.
- Health risks are usually low: While gross, ingesting small amounts of mold is rarely a medical emergency, though it can cause upset stomachs.
- Kill the fungus: White vinegar, diluted bleach, and high-heat steam are your best weapons against mold spores.
- Dryness is key: Never reassemble a sippy cup while it is still wet; trapped moisture guarantees mold regrowth.
Why Mold Grows In Sippy Cups
Sippy cups come in countless shapes and sizes, but they all share one goal: keeping liquids inside the cup.
To make this happen, manufacturers use tight seals, rubber gaskets, and complex valves.
While this smart design saves your carpet from apple juice stains, it creates a perfect storm for bacteria. These hard-to-reach corners trap microscopic sugar, milk particles, and moisture. Since dark, damp, and sugary environments are exactly what spores need to thrive, your child’s cup can quickly become a science experiment.
Take Note
Many parents don’t realize that the valve or the rubber ring (O-ring) inside the lid is removable. If you leave these parts attached during washing, residue builds up underneath them. Over time, that trapped gunk turns into black mold.
What You Should Know About Mold
Mold is a fungus that grows from microscopic spores floating in the air around us. In small amounts, these spores are harmless. However, when they find a spot with moisture, food, and warmth, they multiply rapidly.
When we talk about mold in a house, the danger is usually breathing it in. Large patches of mold release spores into the air, which can irritate the lungs.
Take Note
However, the risk with sippy cups is different. If mold grows inside a cup, your child is likely swallowing it rather than inhaling it. This changes how the body reacts.
What If My Child Ingests Mold?
Take a deep breath and don’t panic. Discovering your child drank from a moldy cup is a horrifying moment for any parent, but it is rarely a medical emergency.
Stomach acid is powerful and kills most bacteria and fungus. Not all molds are toxic, and many children will have no reaction at all (2).
However, you should still monitor your child closely. Some molds can produce mycotoxins that cause illness.
If your child has sensitive digestion, they might experience these symptoms:
- Stomach cramping or pain.
- Sudden vomiting.
- Diarrhea or loose stools.
- Nausea and loss of appetite.
If your child has a specific mold allergy, the reaction might look more like a seasonal allergy or a cold. Watch for these signs:
- Unexplained rashes or hives.
- Swollen lips, face, or tongue.
- Itchy or tingling mouth.
- Sneezing and runny nose.
- Nasal congestion.
- Coughing or wheezing.
Can I Eliminate Mold Completely?
You can kill active mold colonies using common household items. White vinegar, diluted bleach, and tea tree oil are effective antifungal agents (3).
If you choose to use bleach or strong oils, you must rinse the cup incredibly well to ensure your child doesn’t ingest chemical residue.
Heat is another powerful tool. Most mold spores cannot survive boiling water or the steam cycle of a sterilizer.
Keep In Mind
How to Clean a Sippy Cup Properly
Preventing mold is much easier than scrubbing it out. Follow these seven steps to keep your cups sparkling clean.
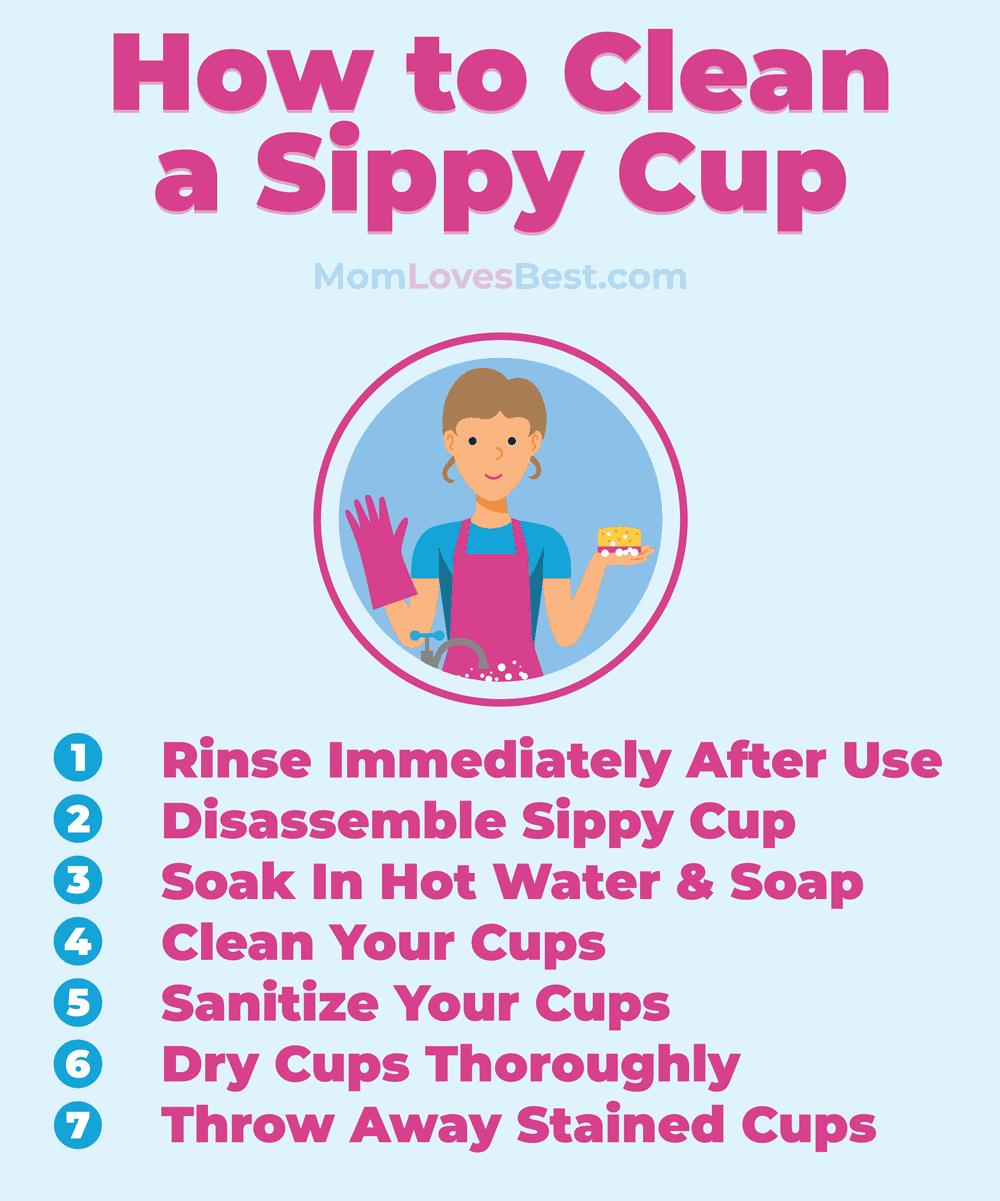
1. Rinse Immediately
The “death knell” for a sippy cup is leaving it in a hot car with milk in it. Even if you can’t wash the cup right away, dump the liquid and rinse it with warm water immediately. This flushes out the sugars that mold spores feed on.
2. Disassemble Everything
You must take the cup apart completely. If two pieces of plastic or rubber are touching, mold can grow between them.
Remove the lid and pull out the pop-up straw. If there is a rubber valve, pull it off the lid. Most importantly, pry out the rubber gasket (the O-ring) that sits in the groove of the lid. This is the number one hiding spot for black mold.
3. Soak in Hot, Soapy Water
Fill your sink with hot water and dish soap. Submerge all the parts and let them soak for at least 15 minutes.
This soaking time softens dried milk curds and sticky juice residue. For extra cleaning power, you can dissolve a denture cleaning tablet in the water; the fizzing action helps loosen gunk in tight crevices.
4. Scrub Every Nook
Sponges are often too bulky for sippy cups and can carry bacteria themselves (4). Instead, use a dedicated bottle brush.
For the small parts, you need precision tools:
- Straw Brushes: Essential for cleaning inside straws and spouts.
- Detail Cleaners: A Q-tip, toothpick, or pipe cleaner works wonders for sliding covers and air vents.
Pinch the rubber valves to open the slit and scrub inside with a small brush. If you can’t see light through the valve, it isn’t clean yet.
Pro Tip
5. Sanitize (Optional but Recommended)
If you found old milk in a cup or just want peace of mind, sanitize the parts. You can use the same methods used for sanitizing baby bottles:
- Vinegar Soak: Soak parts in a mixture of one part white vinegar to three parts hot water. Rinse thoroughly.
- Steam Sterilizer: Use a microwave or electric steam sterilizer to kill germs with high heat.
- Boiling Water: Boil the parts in a pot of water for 5 to 10 minutes. (Check the manufacturer’s instructions first to ensure the plastic is boil-safe).
- Top Rack Dishwasher: If the cup is dishwasher safe, the high heat of the dry cycle helps kill bacteria. Use a dishwasher basket for small valves.
6. Dry Thoroughly (Crucial Step)
This is where many parents go wrong. Never reassemble a sippy cup while it is still damp.
Shake off excess water and place all parts on a drying rack with good airflow. If you screw the lid back on while the cup is wet, you are trapping moisture inside, creating the perfect environment for mold to return. Let the parts air dry completely, overnight is best.
7. Know When To Toss It
If you have scrubbed, soaked, and bleached a cup but it still has black spots or a funky smell, throw it away.
Plastic is porous. Over time, it develops tiny scratches that harbor bacteria deep inside where brushes can’t reach. To stay safe, inspect cups regularly and replace any parts that look chewed, scratched, or permanently stained.
FAQs

Can I Put Sippy Cups In The Dishwasher?
Most modern sippy cups are “top rack dishwasher safe,” but you should always check the manufacturer’s packaging to be sure. If you use the dishwasher, place small parts like valves and straws in a mesh basket so they don’t fall onto the heating element and melt. The high heat of the dishwasher is great for sanitizing, but hand washing is often better for getting into tiny crevices.
How Often Should I Replace Sippy Cups?
It is a good rule of thumb to replace sippy cups every three to six months, or immediately if they show signs of damage. If the plastic is scratched, the spout is chewed up, or the valve is loose, bacteria can hide in those damaged areas. Silicone valves and straws often wear out faster than the hard plastic cup and may need replacement sooner.
How Do I Clean Weighted Straw Cups?
Weighted straw cups are fantastic for babies but tricky to clean. You must detach the straw from the weight if possible. Use a long, thin wire brush (often included with the cup) to scrub the entire length of the straw. Warm soapy water is best, and you can blow air through the straw to clear out water droplets before drying.
Is Black Mold In A Sippy Cup Toxic?
“Black mold” is a scary term, but the black-colored mold found in food containers is often Aspergillus or Cladosporium, which are common household molds. While they aren’t the dreaded “toxic black mold” (Stachybotrys) found in water-damaged walls, they can still cause allergic reactions and stomach upset. It is best to clean it immediately or discard the cup.
Fresh Cups, Happy Kids
Sippy cups are a necessary evil of parenthood. They keep our floors dry, but they demand a little extra attention at the sink.
The secret to beating mold is simple: take it apart, scrub it well, and let it dry completely. By removing the food and moisture mold needs to survive, you can keep your toddler’s favorite cup clean and safe.