Love the idea of babywearing but hate the price tag? We get it.
High-end carriers can cost hundreds of dollars, and even budget options add up quickly. But you don’t need a designer label to keep your little one close.
In this article, we will show you how to make your own baby carrier. We have step-by-step instructions for slings, wraps, and mei tais, plus a few no-sew options so you can start babywearing today, regardless of your crafting skills.
Key Takeaways
- Save money: DIY carriers cost a fraction of store-bought brands.
- Custom fit: Tailor the size and fabric patterns to your specific body and style.
- Versatile options: Choose from ring slings, wraps, or structured Mei Tais based on your comfort level.
- Safety first: Always use sturdy, breathable fabrics and check seams regularly.
Why Make Your Own Carrier?
A baby carrier is a parenting essential. It keeps your baby happy and close while leaving your hands free to tackle laundry, grocery shopping, or chasing a toddler.
However, brand-name gear is expensive. Making your own carrier solves the budget issue immediately. You control the cost by choosing your own materials.
Beyond the savings, a DIY project allows for total customization. You can pick fabrics that match your wardrobe or breathability needs. You can also size the carrier perfectly to your body, ensuring a better fit than a generic “one size fits all” product.
Important Safety Guidelines
Before you start cutting fabric, you must prioritize safety. A homemade carrier needs to be just as secure as a store-bought one.
Follow these rules for safe DIY babywearing:
- Choose the right fabric: Use natural fibers like cotton, linen, or hemp. Avoid slippery synthetics like satin or rayon, as knots can slip. Ensure the fabric is not old or worn out.
- Check your hardware: If making a ring sling, buy aluminum rings specifically designed for babywearing (like SlingRings). Do not use craft store welded rings, as they can break under weight.
- Inspect regularly: Check your seams and fabric for tears or weak spots before every use.
- Follow TICKS: Keep your baby Tight, In view at all times, Close enough to kiss, Keep chin off the chest, and Supported back.
Choosing the Right Style
There are several types of carriers available. Choosing the right one depends on your lifestyle and sewing skills.
Here is a quick breakdown of the most popular DIY styles:
1. Ring Sling
A ring sling is a long piece of fabric looped through two rings. It sits over one shoulder and worn across the torso. It is excellent for quick ups and downs, breastfeeding, and hip carries.
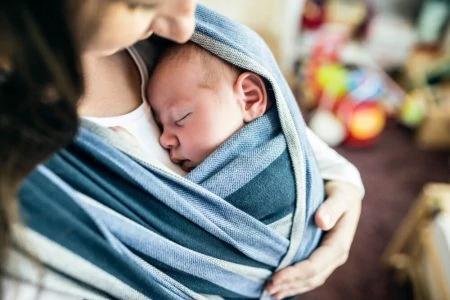
2. Woven or Stretchy Wrap
A baby wrap is a long piece of fabric you tie around your body. Stretchy wraps (jersey knit) are perfect for newborns. Woven wraps (cotton/linen) provide stronger support for heavier babies and toddlers.
3. Mei Tai
A mei tai carrier features a rectangular body panel with four straps coming off the corners. You tie the straps around your waist and shoulders. It offers the support of a structured carrier with the custom fit of a wrap.
How To Make Baby Carriers
Ready to get crafty? We have gathered tutorials for every skill level, including no-sew options for those without a machine.
1. The Classic Ring Sling
This project requires basic sewing skills.
- Gather supplies: You need two aluminum sling rings (medium or large), 2.5 yards of fabric (cotton or linen), thread, and a sewing machine.
- Cut the fabric: Trim your material to be roughly 28 to 30 inches wide and 80 to 90 inches long.
- Hem the edges: Fold the long edges over by 1/4 inch, iron flat, fold again, and stitch. Do the same for one of the short edges. Leave the final short edge raw for now.
- Pleat the shoulder: On the raw short edge, fold the fabric into pleats so it fits through the rings. Alternatively, you can simply gather the fabric.
- Attach the rings: Thread the pleated/gathered end through both rings. Fold the fabric back over the rings by about 6 to 8 inches.
- Sew it shut: Sew three distinct lines across the folded fabric to secure the rings. Use a tight stitch length and backstitch firmly. This is the weight-bearing point, so it must be strong.
- Test it: Pull firmly on the rings to ensure the stitches hold before placing your baby inside.
2. No-Sew Sling
This is a temporary solution using items you likely have at home.
- Find your fabric: Use a woven tablecloth, a sturdy bed sheet, or a long scarf (at least 2.5 yards long).
- Position the fabric: Drape the fabric diagonally across your back. Place one end over your shoulder and the other around your opposite hip.
- Gather the ends: Pinch the fabric on your shoulder and at your waist to bunch it up comfortably. Ensure the fabric across your back is flat, not twisted.
- Tie a slip knot: Tie the two ends in a slip knot near your shoulder or collarbone. A slip knot allows you to adjust the tightness without untying the whole thing.
- Create the seat: Loosen the pouch area, place your baby inside, and tighten the rails (edges) individually to secure them.
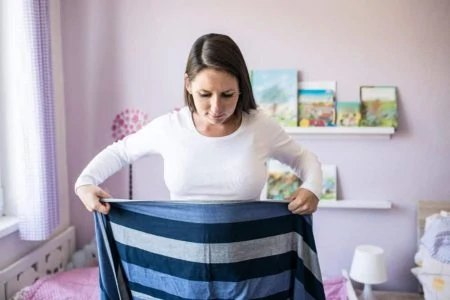
3. DIY Wrap (No-Sew)
This is the easiest and cheapest way to get a Moby-style wrap.
- Buy the fabric: Purchase 5 to 6 yards of cotton jersey knit fabric. It should be 100% cotton or a high-cotton blend for breathability.
- Cut to width: Most fabric bolts are 45 to 60 inches wide. Cut the fabric lengthwise down the middle. This gives you two wraps that are each about 22 to 30 inches wide.
- Check the length: Ensure you have at least 5 yards of length. If you are plus-sized or want longer tails, go for 6 yards.
- No hemming needed: Jersey knit does not fray, so you do not need to hem the edges. You can taper the ends into a point to make tying easier if you wish.
- Wash and wear: Wash the fabric to shrink it slightly and soften it up. It is now ready to wrap.
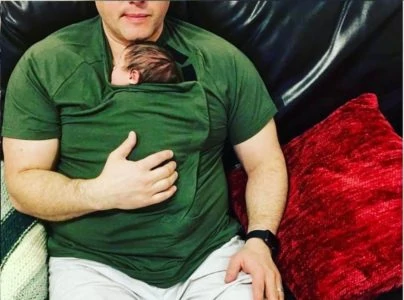
4. Two-Shirt Carrier (K’tan Style)
This creates a double-loop carrier ideal for newborns.
- Get the shirts: You need two strong, seamless t-shirts (size medium or large usually works best) and a third shirt or sash for support.
- Create the loops: Cut the shirts horizontally just under the armpits. You are left with two fabric tubes.
- Put them on: Place one loop over one shoulder diagonally to your opposite hip (like a sash). Place the second loop on the opposite shoulder. They should cross on your chest and back.
- Insert baby: Place your baby in the “X” on your chest. Spread the fabric wide over the baby’s bottom and back, extending from knee to knee.
- Add the sash: Tie the third shirt or a fabric scarf around your midsection, over the baby’s bottom. This third layer is mandatory for safety to prevent the baby from falling backward.
5. The Mei Tai Project
This requires intermediate sewing skills and sturdy materials.
- Body Fabric: Two sturdy rectangular pieces (canvas or duck cloth), 16 x 18 inches.
- Strap Fabric: Two shoulder straps (80 inches long, 4 inches wide finished) and two waist straps (30 inches long, 4 inches wide finished).
- Padding: Fleece or batting for the straps (optional).
- Tools: Sewing machine, heavy-duty needle, sturdy thread.
- Prepare the straps: Fold your strap fabric strips lengthwise, sew the long edge, and turn right-side out. If you want padding, insert it now into the shoulder straps. Topstitch for strength.
- Sandwich the layers: Lay one body panel face up. Pin the waist straps at the bottom corners and the shoulder straps at the top corners. The straps should be pointing inward toward the center of the square.
- Add the top layer: Place the second body panel face down on top. You are making a sandwich with the straps inside.
- Sew the perimeter: Sew around the entire square, leaving a 4-inch gap at the bottom to turn it right side out. Reinforce the corners where the straps are attached by stitching over them multiple times (box stitch with an X).
- Turn and finish: Pull the carrier right side out through the gap. Iron flat. Topstitch around the entire perimeter of the body panel, closing the gap as you go.
FAQs

Do You Need a Baby Wrap?
Technically, no. You can carry your baby in your arms. However, a wrap or carrier is incredibly helpful for bonding and getting things done. Wraps are especially good for the “fourth trimester” as they mimic the womb and keep newborns calm.

What Size Woven Wrap Is Best for Beginners?
A “Size 6” (approximately 4.6 to 4.7 meters) is the standard base size for most parents. It allows you to do the most common carries, such as the Front Wrap Cross Carry. If you are petite, a Size 5 might work; if you are plus-sized, a Size 7 is a safer bet.

Is It Safe to Make Your Own Carrier?
Yes, if you follow safety guidelines. Use new, strong fabric without holes or weak spots. Ensure you use proper thread (polyester is stronger than cotton) and reinforce all weight-bearing seams with multiple rows of stitching. Always test the carrier with a bag of flour or a heavy doll before putting your baby in it.

What Is the Best Fabric for a DIY Wrap?
For a stretchy wrap, use a cotton jersey knit with about 5% spandex. This prevents it from sagging too much. For a woven wrap or ring sling, look for 100% cotton, linen, or a cotton/linen blend. Avoid 100% polyester or silky fabrics, as they do not breathe well and can be slippery.

Can I Use a Regular Bed Sheet?
Yes, for a temporary no-sew sling. A high-quality cotton flat sheet can work well. However, ensure the fabric isn’t too thin or old. Do not use fitted sheets, as the elastic makes them impossible to tie securely.

Which DIY Carrier Is Easiest to Make?
The no-sew stretchy wrap is the easiest. You simply buy the fabric and cut it to width. No sewing machine is required. If you want a structured carrier, the Mei Tai is the most straightforward sewing project, as it involves mostly straight lines.

Can I Carry Twins in a DIY Wrap?
Yes, experienced wrappers can tandem carry twins using a long woven wrap (Size 7 or larger). However, this requires practice. For beginners, it is often safer to wear one baby in a carrier and hold the other, or use a specialized twin carrier like the TwinGo Original.
Final Thoughts
Babywearing is wonderful for bonding, but it shouldn’t break the bank. With a few yards of fabric and a little patience, you can create a safe, comfortable carrier that fits your body perfectly.
Whether you choose a simple no-sew wrap or tackle a Mei Tai project, you are creating a special tool to keep your baby close. Happy crafting!