Your home is your sanctuary, but toss a curious toddler into the mix, and it suddenly feels like a minefield. Whether you are prepping for your first baby or wrangling a chaotic crew of three, safety is the name of the game.
We know the drill. Scanning every room for potential disasters feels overwhelming. But here is the good news: childproofing is manageable if you tackle it one step at a time.
Two of the biggest culprits for tiny fingers? Cabinets and drawers. Let’s break down the best methods and products to keep your little explorer safe and your sanity intact.
Key Takeaways
- Identify hazards first: Crawl around your home to spot reachable dangers from a child’s perspective.
- Relocate and declutter: Move chemicals, sharps, and breakables to high shelves before installing locks.
- Choose the right lock: Select magnetic locks for aesthetics, straps for flexibility, or latches for budget-friendly security.
- Anchor everything: Always secure dressers and heavy furniture to the wall to prevent life-threatening tip-overs.
Beginning the Childproofing Process
Where do you even start when you need to plug every electrical socket and cushion every sharp corner?
I discuss childproofing during the 6-month baby wellness visit. I feel this is a good time because infants haven’t become very mobile yet, and it gives the parent about two to three months to prepare the home.
Editor's Note:
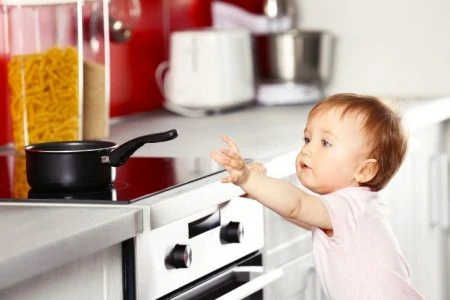
Dr. Leah Alexander, MD, FAAPThe most effective strategy is to change your perspective. Get down on your hands and knees to view the world through your child’s eyes. Go room by room and identify what looks interesting, shiny, or pull-able.
While you are down there, you will likely notice the allure of drawer and cabinet handles. These are high-traffic zones for curious kids and should be at the top of your childproofing list.
How To Childproof Drawers
You might think the only danger lurks inside the drawer, but the structure itself poses risks too. Drawers, and the heavy dressers that hold them, are accidents waiting to happen if left unsecured.
Your child could potentially:
- Access hazards: Grab sharp knives, medications, or choking hazards.
- Pinch fingers: Slam heavy drawers on fragile hands.
- Climb: Use open drawers as a ladder to reach high items.
- Cause tip-overs: Pull the drawer out entirely or bring the whole dresser crashing down.
According to Safe Kids, “tip-over” injuries have spiked by 31% over the last decade (1). It is a scary statistic, but it is preventable.
Here are six effective ways to lock down your drawers, including the best products to get the job done.
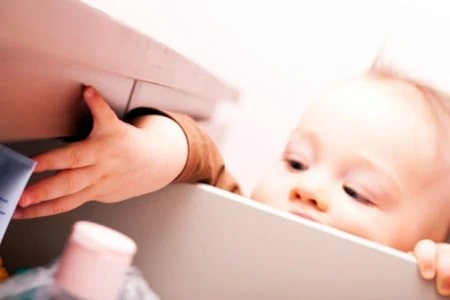
1. Remove Dangerous Objects
Locks are great, but toddlers are little escape artists. As they get older and stronger, your security measures might fail. The safest bet is to remove the danger entirely.
Do a sweep of your lower drawers and relocate these common hazards:
- Sharps: Cutlery, scissors, and knives.
- Fire starters: Lighters and matches.
- Toxins: Medications, vitamins, and cleaning supplies.
- Choking hazards: Batteries, coins, and plastic bags.
- Hot tools: Flat irons and curling wands.
Move these items to high shelves or locked boxes. Do not rely solely on a flimsy plastic latch to protect your child from a firearm or toxic chemicals; store those in proper safes (2).
Pro Safety Tip
2. Use Magnetic Locks

If you want a solution that is invisible from the outside, magnetic locks are the gold standard. They are perfect for maintaining the aesthetic of your kitchen or bathroom cabinetry while offering robust security.
These locks mount inside the drawer face. A powerful magnet keeps the latch closed until you wave a specific magnetic “key” over the outside to release it.
Why buy this? It creates a seamless look with no unsightly plastic straps, and it is generally harder for toddlers to figure out than a push-tab latch.
- Pros: Extremely secure and invisible from the outside. Great for aesthetics.
- Cons: Installation can be tricky without a template. If you lose the magnetic key, you are locked out (keep a spare handy!).
3. Use Tension Rods

For a quick, drill-free hack on a stack of drawers with handles (not knobs), try a tension rod. It is a brilliant temporary solution for grandparents’ houses or rentals.
Simply slide a tension rod vertically through all the drawer handles. Expand it until it fits snugly between the floor and the countertop lip (or the top handle).
Why buy this? It secures an entire bank of drawers with one purchase and requires zero adhesive or screws.
- Pros: Zero damage to furniture; cheap and portable.
- Cons: You have to remove the whole rod to access a single drawer. Clever toddlers may learn to loosen the tension over time.
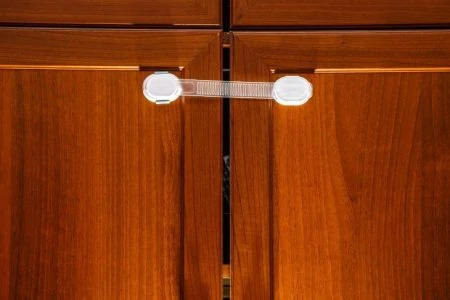
4. Use Adjustable Safety Locks

Need to secure a drawer that wraps around a corner or has an odd shape? Adjustable strap locks are the most versatile tool in your kit.
These feature two anchor points connected by a flexible plastic strap. You stick one end to the furniture frame and the other to the drawer front. To open, you slide or press a button on the mechanism.
Why buy this? They fit almost anywhere (including toilets and appliances) and give you a visual confirmation that the drawer is locked.
- Pros: incredibly versatile; easy “peel and stick” installation.
- Cons: They are visible and can look cluttered. The adhesive can damage paint finishes upon removal if you are not careful.
5. Use Spring-Latch Locks
These are the classic “catch” locks most of us grew up with. They are affordable, reliable, and hidden from view.
You install a plastic arm inside the drawer that catches on the frame when you try to open it. To release it, you push down on the arm through the small opening.
Why buy this? They are cost-effective for baby-proofing a large kitchen on a budget and don’t require a magnetic key.
- Pros: Inexpensive, durable, and intuitive for adults to use.
- Cons: The drawer opens about an inch before catching, which creates a potential finger-pinch hazard. Installation often requires drilling.
6. Use Furniture Anchors
This is non-negotiable. Locking a drawer stops access, but it does not stop a climbing child from pulling a heavy dresser over on themselves.
Furniture anchors (or anti-tip straps) secure the back of the furniture to the wall studs. Even if you think a dresser is heavy enough to stay put, the weight of open drawers plus a climbing child shifts the center of gravity dangerously forward.
Why buy this? It is a life-saving device that prevents crushing injuries. Every standalone unit in your home needs one.
- Pros: High weight capacity; essential for preventing severe injuries.
- Cons: Requires drilling into the wall and locating studs, which can be intimidating for some DIYers.

How To Childproof Cabinets
Cabinets are basically Pandora’s box for toddlers. They are large, dark, and filled with fascinating noisy things like pots and pans, or dangerous things like bleach.
Unsecured cabinets pose several serious risks:
- Poisoning: Access to under-sink cleaning agents or bathroom meds.
- Impact injuries: Pulling heavy cast iron pans onto their feet.
- Trapped fingers: Pinching digits in the hinges or doors.
- Entrapment: Crawling inside larger cabinets and getting stuck.
1. Remove Dangerous Objects
Just like with drawers, the first step is a purge. Move these items out of lower cabinets immediately:
- Chemicals: Bleach, dishwasher pods, and sprays.
- Fragile items: Glass vases or ceramic bowls.
- Appliances: Blenders or toasters with trailing cords.
- Suffocation risks: Plastic grocery bags or dry cleaning wraps.
Because of brightly colored laundry detergent pods, there have been more cases of accidental detergent ingestion (3).
Editor's Note:
Dr. Leah Alexander, MD, FAAPYou should also watch out for messy (though not necessarily deadly) items:
- Pantry staples: Flour, sugar, and syrup (a nightmare to clean up).
- Sharp packaging: Aluminum foil serrated edges.
2. Use Sliding Locks
If your cabinets have handles or knobs side-by-side (mushroom knobs or D-shaped handles), sliding locks are the easiest solution.
These look like long U-shaped bicycle locks. You thread the lock through both handles and slide the catch tight so the doors cannot separate.
Why use them? They require zero installation or adhesive, making them perfect for renters or temporary use.
- Pros: Portable, reusable, and no damage to cabinets. Great for grandparents.
- Cons: They are very visible. You have to remove the entire device every time you want a snack, which can get annoying.
3. Use Velcro
Velcro is a decent “light duty” option if you don’t want to drill or deal with complex plastic latches.
Place an adhesive hook strip on the inside frame and the loop strip on the inside of the door. When you close it, they bond.
Why use it? It is invisible from the outside and very cheap.
- Pros: Easy to install and remove; no tools required.
- Cons: Weak security. A determined toddler can yank the door open with enough force. Use this only for non-hazardous cabinets (like the Tupperware cupboard).
Sticky Tip
4. Use Pull Cord Locks
Pull cord locks are specifically designed for side-by-side round knobs. They work like a drawstring on a hoodie.
You loop the cord around both knobs, press the toggle, and slide it tight.
Why use them? They are virtually impossible for a child to loosen because of the dexterity required to press the button and slide simultaneously.
- Pros: Very secure for round knobs where sliding locks might slip off.
- Cons: Danging cords can be a strangulation risk if they are too long. Ensure you buy a model with short loops or keep the excess tied up.
5. Create Foam Bumpers
If you have a cabinet that does not contain dangerous items but keeps getting slammed by an enthusiastic toddler, save your child’s fingers (and your ears) with a foam bumper.
Slice a pool noodle or pipe insulation lengthwise and slip it over the top edge of the cabinet door, high out of reach. This stops the door from closing completely, preventing crushed fingers.
6. Cover Knobs
If your cabinet knobs are large and protrude at toddler eye level, they can cause nasty bumps.
You can soften the blow by covering knobs with DIY solutions like crocheted covers or even tennis balls with a slit cut in them (though that is not the most stylish look).
- Pros: Prevents bruises from accidental collisions.
- Cons: It does not lock the cabinet; it only cushions the hardware.
Other Childproofing Tips
Now that you have the hardware installed, here are a few behavioral tricks to keep your home safe.
- Stealth mode: Toddlers are mimics. Try to avoid opening safety locks while your child is watching, or they will learn how to bypass them in record time.
- The “Yes” drawer: Designate one safe, unlocked drawer or cabinet filled with plastic bowls, wooden spoons, and safe toys. It satisfies their curiosity and keeps them away from the dangerous stuff.
- Education: As they grow, teach them what “ouch” and “no touch” mean. Explaining the danger helps reinforce boundaries.
Remember That Supervision is Essential
Childproofing devices are backups, not babysitters. Nothing replaces a watchful eye.
Devices can fail, adhesives can weaken, and kids can get surprisingly strong. Always supervise your children in the kitchen and bathroom. If you need to cook or clean and cannot watch them 100%, use baby gates to create a safe play zone away from hazards.
Childproofing Cabinet and Drawer FAQs

Do You Need To Baby-Proof Cabinets?
Yes, absolutely. Cabinets often contain hazardous chemicals, glass, or heavy items. Even if empty, heavy cabinet doors can slam on small fingers.

How Do You Put Knobs On Cabinets Without Holes?
You can use adhesive cabinet handles or locks. These stick directly to the surface using strong 3M tape, allowing you to secure the door without drilling permanent holes.

Do Child Safety Locks Damage Cabinets?
It depends on the type. Screw-in locks leave permanent holes. Adhesive locks are generally safe, but removing them requires care (use heat from a hair dryer) to avoid peeling the paint or varnish.

How Do You Baby Proof A Drawer Without Drilling?
Magnetic adhesive locks and adjustable safety straps are the best drill-free options. For dressers with handles, a tension rod slid through the handles is a great zero-damage hack.
How Can I Remove Adhesive Residue From Locks?
To remove sticky residue left by safety locks, apply heat with a hair dryer to soften the glue, then gently scrape it off with a plastic card. Use a citrus-based cleaner or rubbing alcohol to wipe away the remaining gunk.
Are There Locks For Glass Cabinet Doors?
Yes. For glass cabinets, look for adhesive sliding locks or alligator-clip style locks that grip the glass edge without needing screws. Avoid pressure-mounted locks that could crack the glass.