Art is beneficial for kids in ways that go far beyond a pretty picture on the fridge. It helps little ones develop fine motor skills, process big emotions, and express themselves when words just won’t cut it.
In this guide, we have curated 15 creative art activities and ideas for kids that are simple, budget-friendly, and packed with color. Whether you have a tiny tot or a grade-schooler, there is a project here to spark their imagination.
Key Takeaways
- Sensory exploration: Finger painting introduces babies and toddlers to textures and colors, with mess-free options available for easy cleanup.
- Nature and shapes: Creative collages encourage children to explore the outdoors and understand geometry while boosting fine motor skills.
- Technique building: Drawing and painting projects let kids experiment with shadows, tracing, and science-based methods like bubble painting.
- Upcycling fun: Crafting with household items teaches resourcefulness by turning egg cartons and kitchen towels into masterpieces.
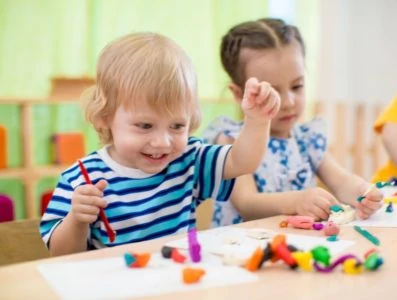
Finger Painting
Finger painting is a rite of passage for budding artists. It is an excellent way to introduce babies and toddlers to art because it focuses on sensory play. They get to explore the feel of paint squishing between their fingers and witness the immediate cause-and-effect of spreading color.
Non-Messy Finger Painting
Does painting without the cleanup sound impossible? It is actually quite simple. This method is suitable for babies as soon as they can enjoy tummy time. It introduces them to the concept of moving pigment around without putting your carpet at risk.
What You Need:
- Paints: Bright finger paints work best.
- Paper: White cardstock or construction paper.
- Protection: A gallon-sized plastic freezer bag.
- Tools: Scissors and masking tape.
Crazy Monsters
This project is generally better for kids over the age of 3 since it involves small parts. It is a fantastic way to turn random colorful blobs into “scary” or silly creatures. Older kids can handle this independently, while preschoolers will enjoy doing it with a little help.
What You Need:
- Paint: Finger paints in various colors.
- Applicator: Paintbrush (optional, fingers work too).
- Base: Cardstock.
- Accessories: Sticky-back googly eyes and colorful feathers.
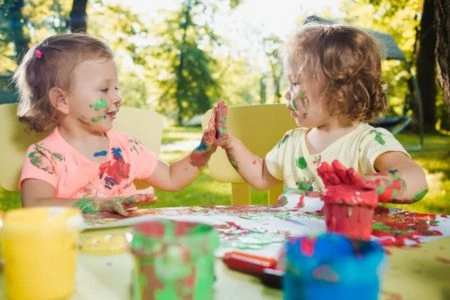
Let Your Toddler Loose
Sometimes you just have to lean into the chaos. While mess-free options are great, there is nothing quite like the sensory experience of skin-on-paint. This activity has no rules; it is purely about letting your little one experiment with color mixing and texture. Pro tip: Have a warm bath ready immediately after.
What You Need:
- Paper: Large butcher paper or easel paper to cover a wide area.
- Paint: Washable, non-toxic tempera or finger paints.
- Protection: A plastic drop cloth or old sheet for the floor.
- Attire: Old clothes or just a diaper (if the weather is warm).
- Palette: A paper plate for easy access to colors.
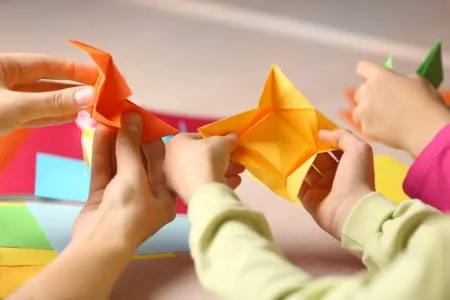
Creative Collages
Collaging is all about layering. It involves sticking various materials onto a backing sheet to create texture and depth. This is amazing for developing the “pincer grasp” and learning about adhesives. Here are a few projects to get the glue flowing.
Leaf People
When the seasons change, art class can move outside. Taking a nature walk to collect supplies helps kids connect with their environment before they even start creating. By arranging leaves, twigs, and seeds, children can create characters or animals.
What You Need:
- Foliage: Leaves of different sizes, shapes, and colors.
- Adhesive: Craft glue or a glue stick.
- Base: White paper or cardstock.
- Extras: Googly eyes or markers for facial features.
Shape Collage
This project doubles as a geometry lesson. By handling circles, squares, and triangles, children learn to identify shapes while building an abstract masterpiece. It is perfect for preschoolers, though you may need to assist with the cutting or gluing depending on their dexterity.
What You Need:
- Shapes: Pre-cut shapes from tissue paper, foam, fabric, or construction paper.
- Base: Heavy paper.
- Adhesive: Glue sticks or white glue.
I Can Make a Rainbow
Ideal for preschoolers, this cutting and pasting project strengthens scissor skills. Following the arc of a rainbow helps with hand-eye coordination, and hunting for the right colors is a fun scavenger hunt.
What You Need:
- Scraps: Paper in red, orange, yellow, green, blue, and purple.
- Textures: Recycled magazines, wrapping paper, or glitter paper.
- Adhesive: Kid-safe PVA glue.
- Base: White cardstock.
- Tools: Safety scissors.
- Guide: A printed rainbow template or a hand-drawn outline.
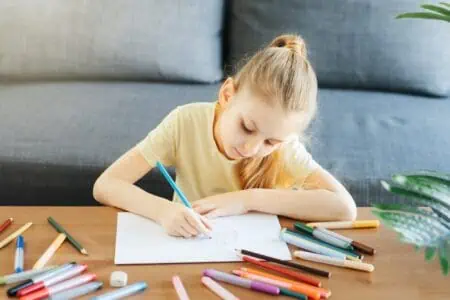
Drawing Projects
Once your child can grip a crayon, they are ready to draw. What starts as scribbles eventually evolves into recognizable figures (tadpole people, anyone?). These activities help guide that transition from random marks to intentional lines.
Tandem Drawing
This is a collaborative game where you draw alongside your child. You do not need to be Picasso; the goal is connection, not perfection. You might take turns adding to a single picture or draw the same object to see how your interpretations differ.
What You Need:
- Medium: Markers, colored pencils, or crayons.
- Base: Printer paper or a sketchpad.
Shadow Drawing
Combine science and art by tracing shadows. This outdoor activity teaches kids about light sources and perspective. It requires a steady hand to trace the outline, which promotes precision and focus. It is best done in the morning or late afternoon when shadows are long.
What You Need:
- Base: A large sheet of paper (easel paper works well).
- Subjects: Toy dinosaurs, dolls, or action figures.
- Tools: Pencils or markers.
- Conditions: A sunny day and a flat surface.
Portrait Drawing for Beginners
Drawing faces is notoriously difficult, even for adults. This clever hack uses a transparent sheet to help kids understand facial proportions without the frustration. It is suitable for kids over 4 and produces hilarious and surprisingly accurate results.
What You Need:
- Surface: Clear plastic sheet protectors or a plexiglass sheet.
- Medium: Dry-erase markers.
Simply hold the plastic sheet up to a friend’s face (or look in a mirror) and trace what you see directly onto the plastic.
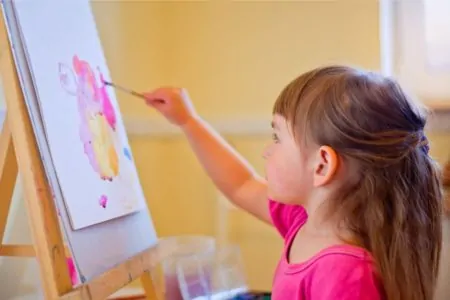
Painting Projects
Painting transforms a blank canvas into a world of color. Whether using brushes, bubbles, or tape, painting activities hone fine motor coordination and teach children about color theory and blending.
Swirling Flowers
This technique creates a marbled, rose-like effect that looks complex but is incredibly easy to execute. It allows children to experiment with wet-on-wet painting and mixing. The results are instant, which keeps impatient little artists engaged.
What You Need:
- Paint: Tempera or acrylic paints in floral colors.
- Tools: Medium-sized flat paintbrushes.
- Base: Heavy mixed-media or watercolor paper.
Bubble Painting
Put down the brushes and grab a straw. This STEM-meets-art project uses air pressure to create unique, cellular patterns on paper. It is a hit with older kids, though younger ones can do it with supervision to ensure they blow out rather than suck in.
What You Need:
- Mixture: Water, dish soap, sugar (for stronger bubbles), and watercolor or food coloring.
- Containers: Plastic cups or bowls.
- Tools: Plastic straws.
- Base: Watercolor paper.
Sunburst Paintings
This is a “tape resist” style project that results in crisp, geometric lines. It teaches patience and planning. Kids love the “reveal” moment when the tape is peeled back to show the clean white lines separating the bursts of color.
What You Need:
- Tools: Ruler, pencil, and paintbrush.
- Resist: Painter’s tape or masking tape.
- Paint: Watercolors.
- Base: Watercolor paper.
- Shape: A small circular object (like a bottle cap) to trace.
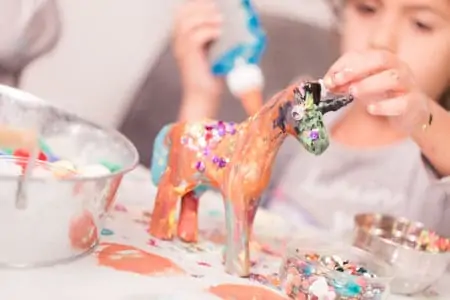
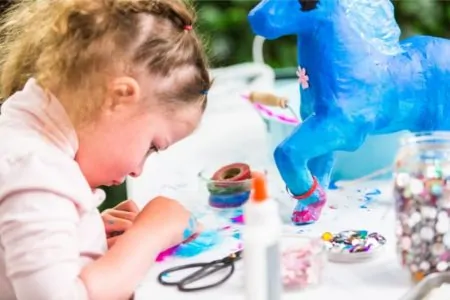
Arts and Crafts With Household Items
You do not need a trip to the craft store to make art. Some of the best creativity comes from upcycling items you already have in the recycling bin or kitchen drawer. It saves money and teaches kids to see potential in everyday objects.
Egg Carton Cars
Turn trash into treasure by transforming egg cartons into a fleet of racers. This 3D art project involves painting, gluing, and assembly, providing a full workout for dexterity skills.
What You Need:
- Body: Cardboard egg cartons (cut into cups).
- Paint: Acrylic paints and brushes.
- Wheels: Large buttons or bottle caps.
- Adhesive: Strong craft glue.
- Details: Sharpie pen and white foam/paper.
Coloring With Kitchen Towel
This activity uses the science of chromatography (how water moves through paper). It takes minutes to set up but is fascinating to watch as the ink spreads and blends into tie-dye patterns.
What You Need:
- Base: A sheet of absorbent kitchen paper towel.
- Medium: Washable marker pens.
- Catalyst: Water and a pipette (or a spoon).
- Surface: A plate or tray to catch the mess.
String Art
If you have leftover yarn, this is the perfect way to use it. String art introduces the basics of sewing and embroidery in a kid-friendly format. Because it involves a needle, this is best suited for school-aged children who want to improve their precision.
What You Need:
- Base: Thick cardstock or cardboard.
- Tools: Scissors, pencil, and a thick plastic tapestry needle.
- Thread: Yarn, embroidery floss, or thick thread.
- Decoration: Pom poms, beads, or glue (optional).
You can make a string art dinosaur, a butterfly, or abstract shapes. The process of punching holes and threading the yarn remains the same regardless of the design.
FAQs
Why Is Art Important for Child Development?
Art aids in the development of fine motor skills, cognitive development, and emotional regulation. Gripping a crayon improves hand strength needed for writing, while the creative process encourages problem-solving and self-expression. It creates neural connections that help with learning other subjects later in life.
How Do I Deal With the Mess of Kids’ Art Projects?
Preparation is key. Designate a specific “art zone” with a plastic drop cloth or old sheet on the floor. Use washable paints and markers whenever possible. Dress your child in an oversized old t-shirt or a smock, and keep a damp washcloth or baby wipes nearby for quick cleanups during the activity.
What Are the Basic Art Supplies I Should Have at Home?
To start, you only need a few essentials: a stack of paper (printer paper or construction paper), washable markers, crayons, kid-safe scissors, and glue sticks. As your child gets older, you can add washable tempera paint, paintbrushes, and watercolor sets to your kit.